Welcome to an ultra-short tutorial of Free Batch Watermark Studio.
Free Batch Watermark Studio is a very easy to use program to put watermarks on your photos and has a pleasing yet powerful and functional user interface.1. Watermarking photos
- Select one or more image files for watermarking.
- Add logo or text watermark.
- Select output folder.
- Press the Convert button
2. Resizing photos
- Select one or more images for resizing.
- Select output folder.
- Adjust the resize slider.
- Press the Convert button.
3. Converting image file formats
- Select one or more photos for image format conversion.
- Select the output file format.
- Select output folder.
- Press the Convert button.
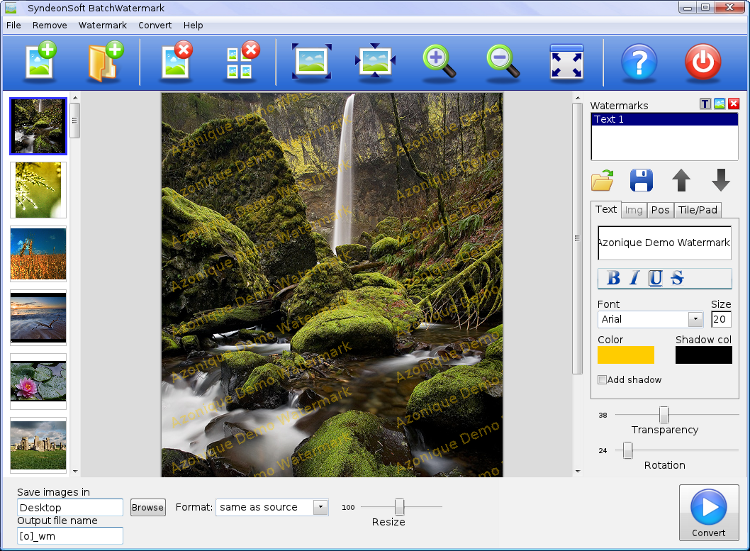
Watermarking photos
- Select one or more image files for watermarking: Click on the toolbar icons to add files (Add file(s)) or folders (Add folder). This will load thumbnail images of your selected photos into the thumnails list on the left.
- Add an image or text layer: on the right panel: add an image or text layer by clicking on the respective small icon next to the watermarks field. If you choose a text layer fill out the Text tab with your branding text and the font attributes. If you choose an image layer: select an image with the file chooser and resize the image to your liking. In either case go on to adjust the position, tiling, transparency and rotation to your liking. Add more layers if needed.
- Select output folder: Click on the browse button to choose your output folder for the processed images. You can also change how the processed files will be named in the “Output file name” field.
- Press the Convert button: this will start the processing. All files will be loaded one after another and the watermark applied. The resulting new watermarked files will be saved in the output folder with an new name.
Resizing Photos
While Free Batch Watermark Studio has been primarily designed to apply watermarks to photos and images it can also be used to resize any number of photos.
- Select one or more images for resizing: Click on the toolbar icons to add files (Add file(s)) or folders (Add folder). This will load thumbnail images of your selected photos into the thumnails list on the left.
- Select output folder: Click on the browse button to choose your output folder for the processed images. You can also change how the processed files will be named in the “Output file name” field.
- Adjust the resize slider: The numbers are in percent of the original file size.
- Press the Convert button: this will start the processing. All files will be loaded one after another and resized appropriately. The resulting new resized files will be saved in the output folder with an new name.
Converting photos to different file formats
While Free Batch Watermark Studio has been primarily designed to apply watermarks to photos and images it can also be used to convert any number of photos into different image file formats.
- Select one or more images for image file format conversion: Click on the toolbar icons to add files (Add file(s)) or folders (Add folder). This will load thumbnail images of your selected photos into the thumnails list on the left.
- Select output folder: Click on the browse button to choose your output folder for the processed images. You can also change how the processed files will be named in the “Output file name” field.
- Select file format: select the new image file format in the Format drop down menu.
- Press the Convert button: this will start the processing. All files will be loaded one after another and saved in your chosed image file format. The resulting new files converted into the new image file format will be saved in the output folder with an new name.
That’s it. Really! Try it out. You will love the simplicity of Free Batch Watermark Studio.
If you like to have more information on Free Batch Watermark Studio then read the Free Batch Watermark Studio help page for more details.