Welcome to an ultra-short tutorial of Steganomatic.
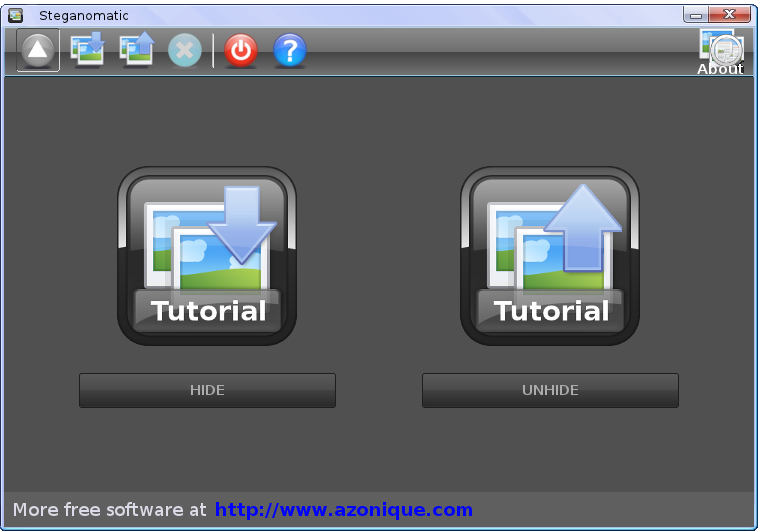
Steganomatic is a very easy to use program and has a pleasing yet powerful and functional user interface.1. Hiding Secret Files in Images
- Select “Hide” from the dashboard.
- Select one or more container files to hide your secret data.
- Select one or more secrete data files to hide.
- Optionally: add a secret message.
- Optionally: choose to encrypt your data: select a suitable encryption algorithm and set a password.
- Select the output folder for the pictures with the hidden data.
- Press the Hide button.
2. Recovering / Unhiding Secret Files from Images
- Select “Unhide” from the dashboard.
- Select one or more image files which contain hidden information.
- Optionally: Tick “Use encryption” and provide password and decryption algorithm.
- Press the Unhide button.
Hiding Secret Files in Images
Clicking on the ‘Hide’ button in the dashboard brings you to the interface for hiding secret files in images:
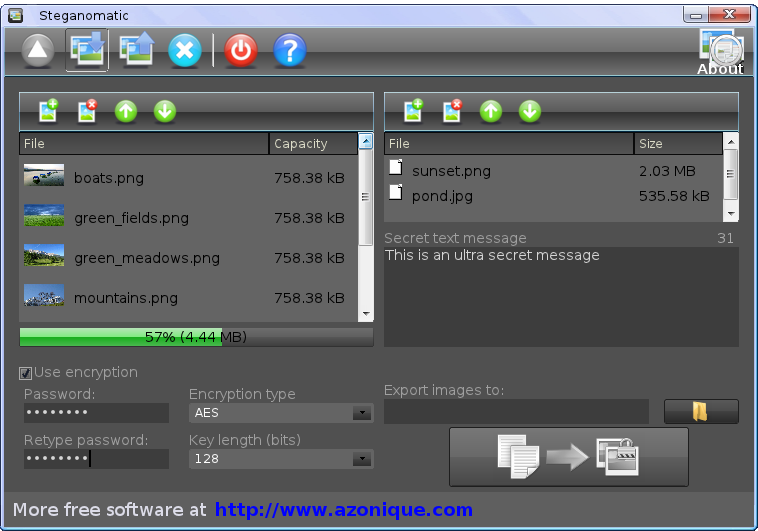
- Choose one or several container images by clicking the add-file icon on the left. This will popup a file choosing dialog where you can pick a file(s). Allowed image file formats are JPG, PNG, GIF and BMP images.
- Chose one or more secret files to hide within the container images with the add-file icon on the right. This will popup a file choosing dialog where you can pick a file(s). Observe the fill bar indicator to gauge if you have enough space in the container images.
- Optional: Add a secret message or instruction. It is also possible to have only a secret message without attached secret files.
- Optional: Tick “Use encryption”, set a password and choose a suitable encryption algorithm and key bit length.
- Select the output folder for the pictures with the hidden data (Export images to).
- Click on the “Hide” button which will become only active if you have selected all necessary data.
Unhiding / Retrieving Secret Files from Images
Clicking on the ‘Unhide’ button in the dashboard brings you to the interface for unhiding / recovering secret data from image files:
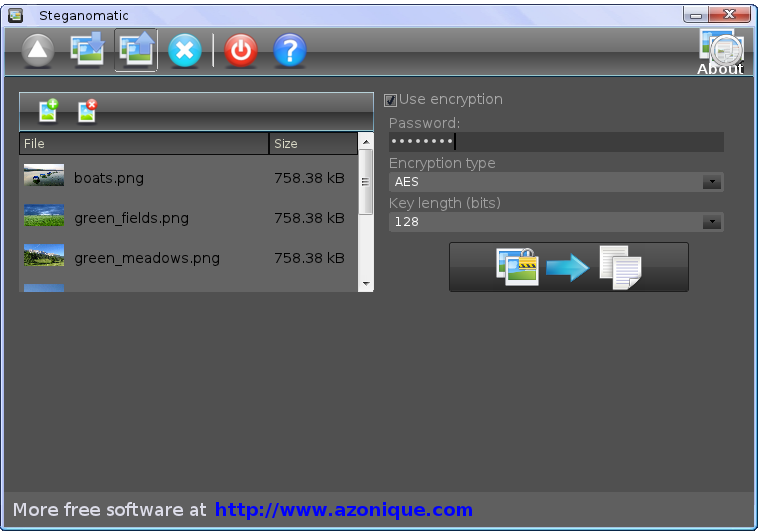
- Choose one or several container image files which contain hidden data. Click the add-file icon on the left. This will popup a file choosing dialog where you can pick a file(s).
- Optional: Tick “Use encryption” and provide a password, the decryption algorithm and the key length.
- Click the “Unhide” button.
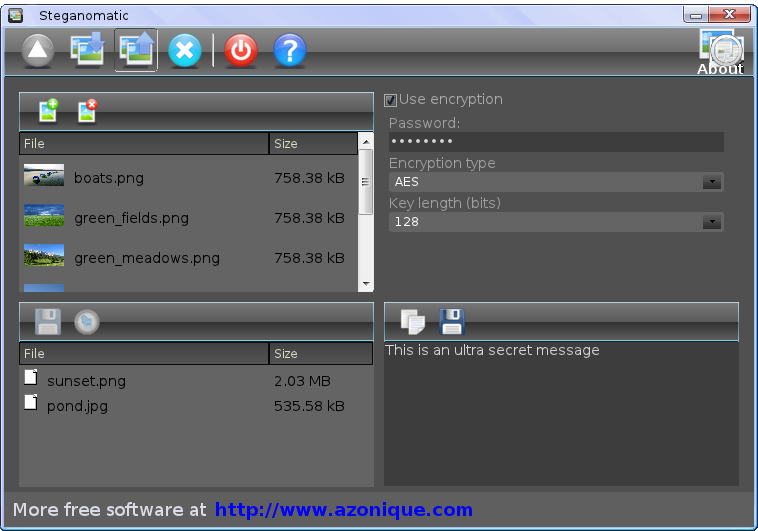
- Select one or more files in the list you want to export.
- Click the “Export” icon and provide the folder location, where you want to extract the data.
To save the secret message into a file:
Click on the save icon on the right and choose a folder location, where you want to save the message. To copy the secret message to the clipboard click the clipboard icon and paste it into another application for further processing. Read the Steganomatic help page for more details.That’s it. Really! Try it out. You will love the simplicity of Steganomatic.
If you like to have more information on Steganomatic then read the Steganomatic help page for more details.